Arduino Library
Link Labs maintains a sweet Arduino library at our Bitbucket repository. The Arduino library is essentially a C++ wrapper of the host interface C library we provide to control our Symphony Link modules.
Our Bitbucket repo also includes example Arduino sketches, which use the Arduino library and will work out-of-the-box to control an LL-RLP-20 or LL-RXR-27 evaluation board using an Arduino Due. The example sketches are a great way to start rapid application development for Symphony Link. The examples sketches are constantly being updated, so check back frequently.
This chapter explains details about the library, how to install it and use it with Arduino IDE, and what is happening behind the scenes with the Symphony Link module.
Hardware Setup
Before you get started with software development, you first need to connect your hardware. This chapter assumes you are controlling a Symphony Link evaluation board using Arduino Due.
To learn how to make the hardware connections between a Symphony Link evaluation board and Arduino Due, check out this article. It includes wiring diagrams and tips for success.
Get the Library
To download the Arduino library, navigate to our LinkLabs/linklabs-arduino repo on Github. Click the Clone or download button and then Download ZIP to download the compressed library.

Import the Library into the Arduino IDE
We're assuming here that you want to use the Arduino IDE to develop for the Arduino Due. (You don't have to... there are tons of ways to work with Arduinos.)
Before you can use the library in the Arduino IDE, you need to install the library. To do so, follow the Importing a .zip Library section of this page.
Once you've successfully imported the library, you should see it in the libraries subdirectory of your Arduino directory (which installs with the Arduino IDE).

Open SymphonyLink_Example.ino
If it's your first time working with Symphony Link and Arduino, we suggest you start with the SymphonyLink_Example.ino example sketch. It's the Hello World! of Symphony Link.
The SymphonyLink_Example.ino sketch is provided with the Arduino library. After you've imported the library, you'll find it in its own sub-directory in your Arduino directory.

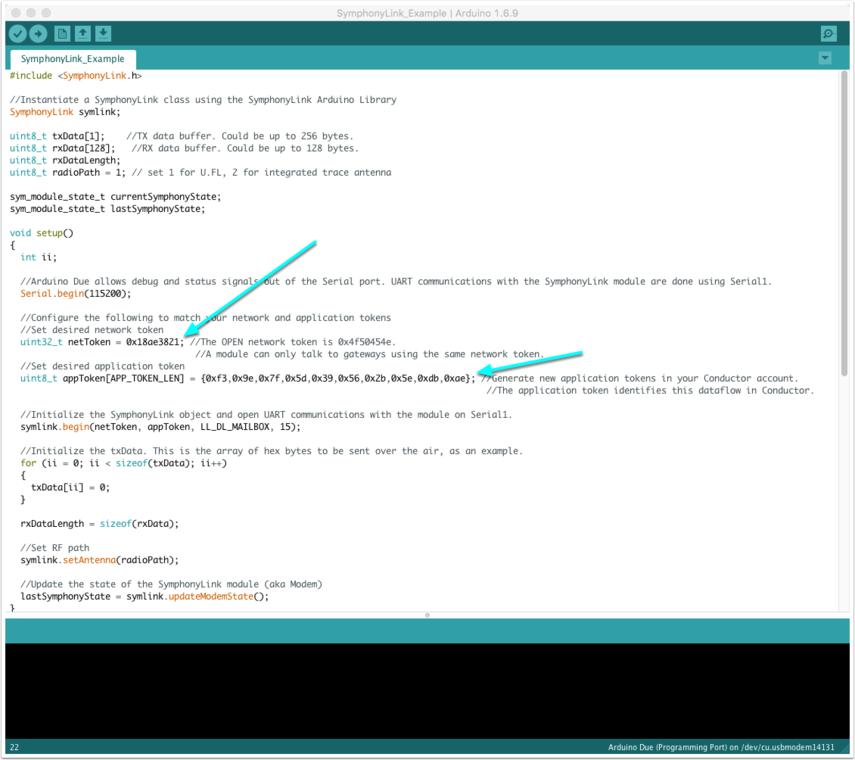
Go ahead and open the sketch in the Arduino IDE. It looks something like this...
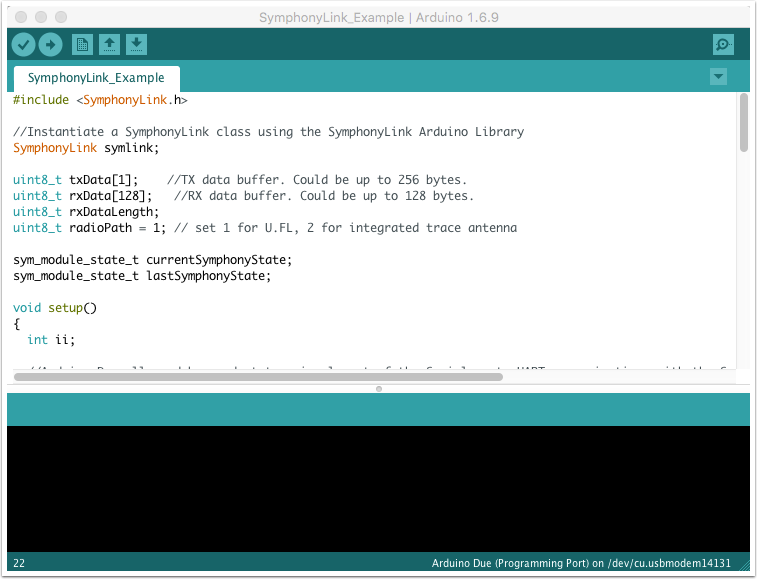
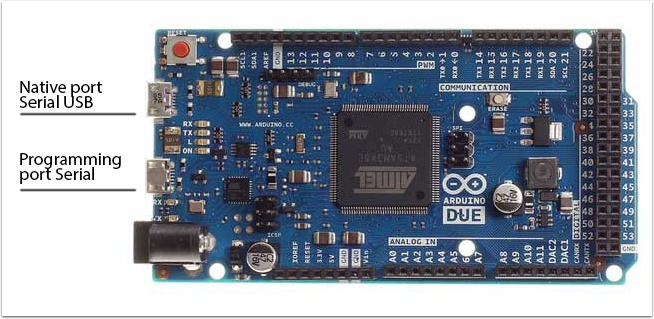
Before we can use the sketch, there are a few other setup items, which we'll cover in the next few articles. For now, make sure the programming port of your Arduino Due is connected to your PC via USB. And of course, make sure the Symphony Link evaluation board is connected to the Arduino Due.
Make sure the Arduino IDE is talking to the correct serial port. To do so, go to Tools > Port and select the port on which the Arduino Due has enumerated.
Setup a Symphony Link Gateway
Before you can start communicating over-the-air with the SymphonyLink_Example sketch, you need to get a gateway up and running.
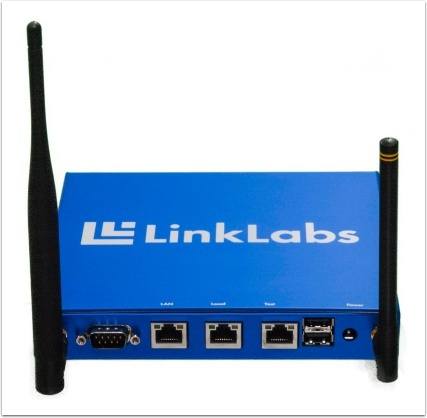
If you're new to Symphony Link, checkout this site for instructions to setup a gateway.
Be sure to take note of the Network Token your gateway is using. You'll need to insert it into the example sketch.
Make a Symphony Link Application
You'll need to insert one of your own Application Tokens into the example sketch to make it work.
If you're new to Symphony Link, check out this article to make an application from your Conductor Account.
Take note of the Application Token you want to use. You'll need to insert it in the example sketch.
Insert your Network and Application Tokens into SymphonyLink_Example.ino
Insert your specific Network Token and Application Token into the example sketch. An example is shown below...
Flash the Sketch to the Due
Click the Arduino IDE's upload button to compile the sketch and flash it to the Arduino Due.

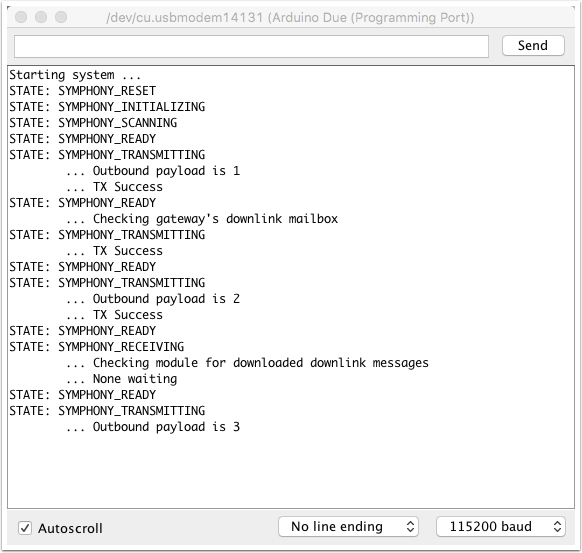
Open the Arduino IDE's Serial Monitor by selecting Tools > Serial Monitor. The example sketch prints useful debug info to the Serial Monitor...
The SymphonyLink State Machine
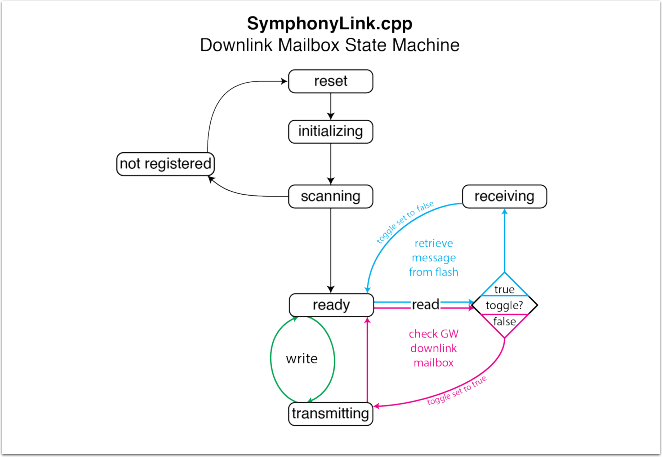
The Arduino library (a.k.a. the SymphonyLink.cpp library) uses a very simple state machine.
