Demo Videos
Setting up your Gateway
Getting Started with the Evaluation Board
Step 1: Turn on the gateway
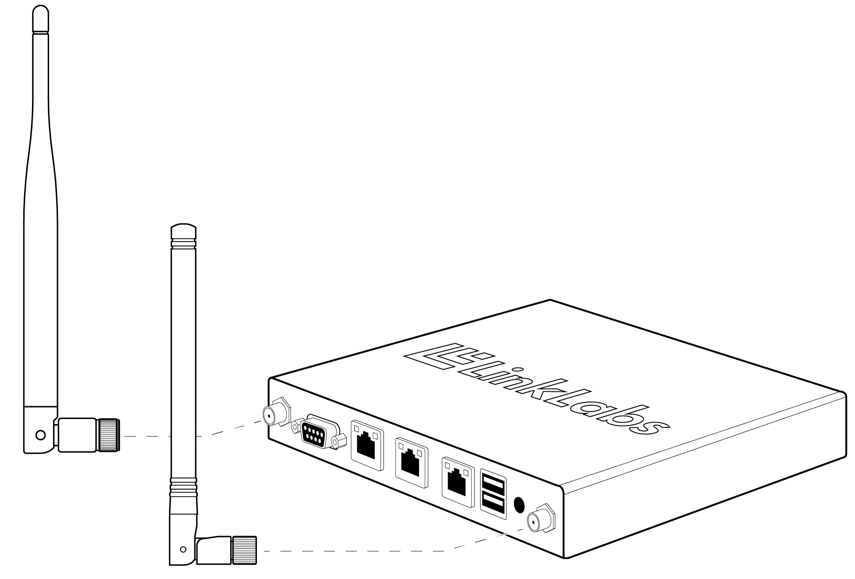
Connect the antennas.
Connect the 915-MHz antenna to the gateway's UHF antenna jack and the Wifi antenna to the Wifi jack.
Apply power.
Connect one end of the wall-plug adapter to the gateway's Power port and the other end to an electrical outlet.
Step 2: Access the gateway's local webpage
Connect a PC.
Wait a minute for the gateway to bootstrap, then connect a PC to the local Ethernet jack (the middle one) using the provided Ethernet cable.
Navigate to the local webpage.
On the connected PC, open a browser and navigate to 192.168.3.3. Log in using username "admin" and password "password."
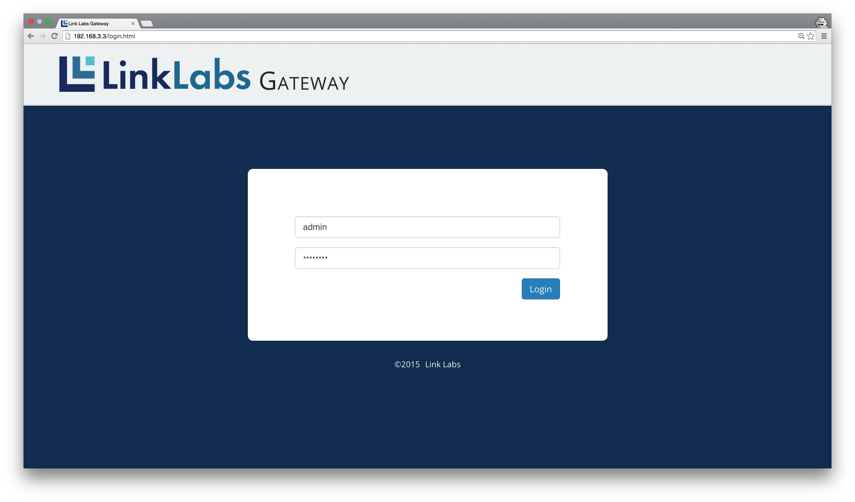
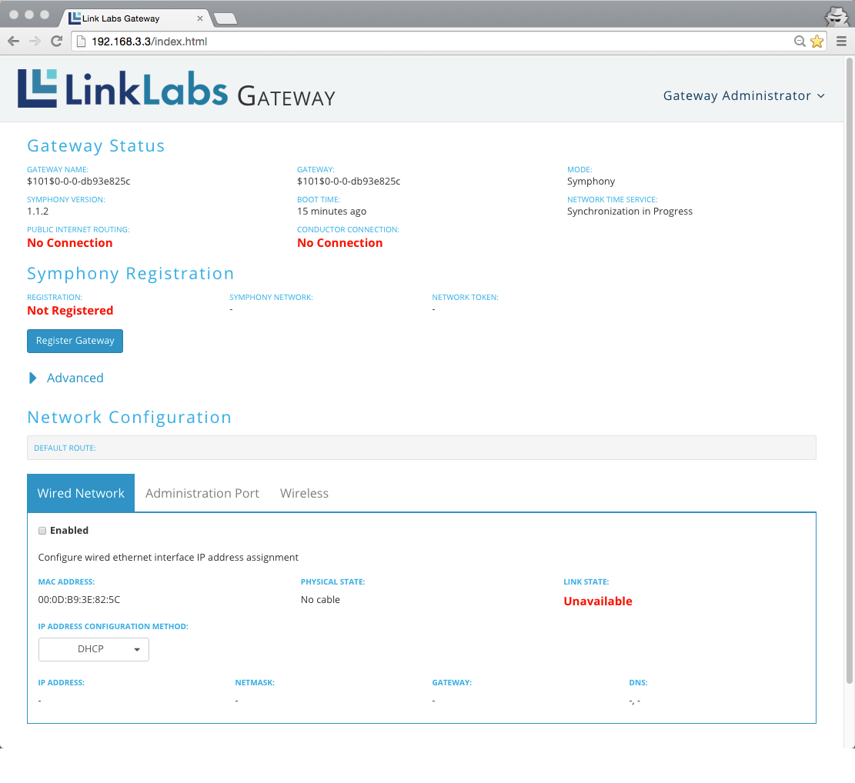
The gateway's local webpage appears.
The local webpage provides an interface to view the status of the gateway, to connect it to the Internet, and to register the gateway with a Conductor account.
Step 3: Connect the gateway to the Internet
To connect using WiFi...
In the Wireless tab of the local webpage, select the Enabled checkbox.
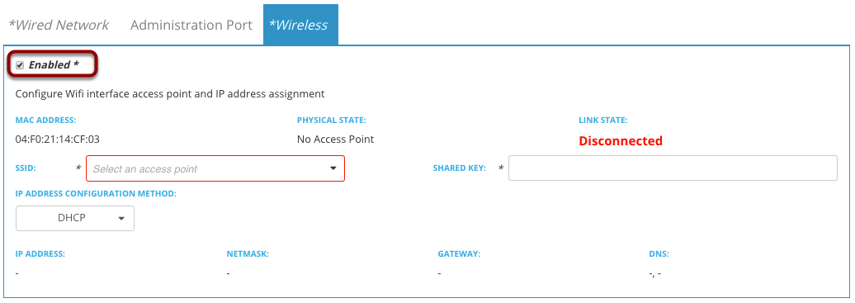
Select a Wifi network from the SSID dropdown listbox and enter the password in the SHARED KEY editbox. Click Submit.
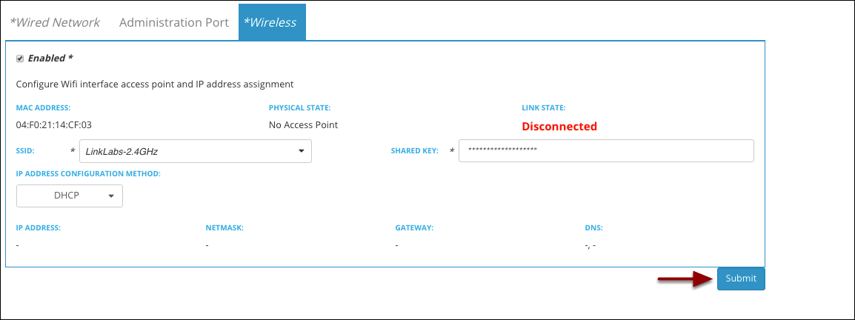
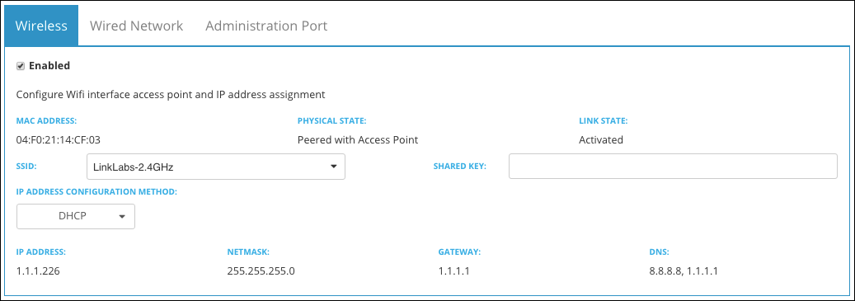
After a few moments, the Wireless tab updates with the connection information.
To connect via wired Ethernet...
Connect a DHCP-enabled network to the gateway's LAN Ethernet jack (the one closest to the serial connector).
In the Wired Network tab, select the Enabled checkbox. Click Submit.
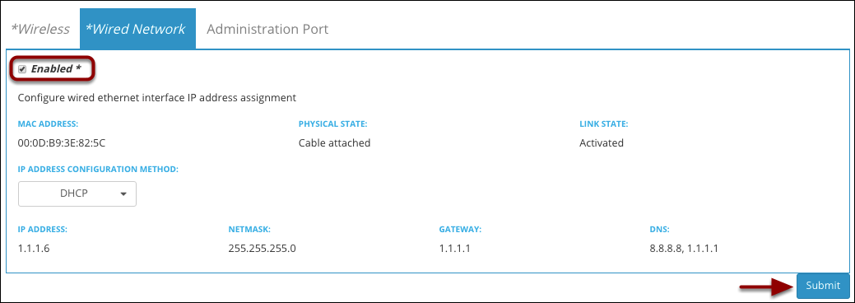
After a few moments, the Wired Network tab updates with the connection information.
Step 4: Register the gateway with Conductor
This step connects your gateway to your web-based Conductor account.
Register the gateway.
Once the gateway is connected to the Internet, click the Register Gateway button in the Symphony Registration section of the local webpage.

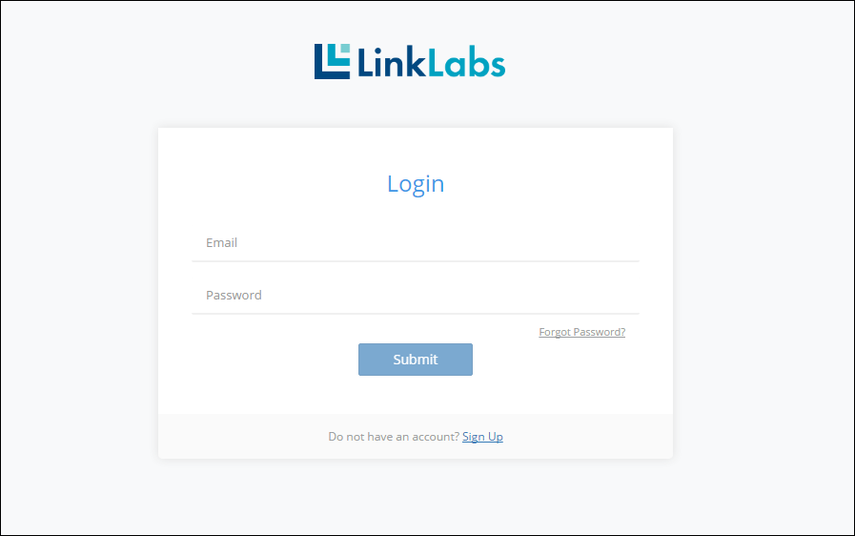
The Conductor Login prompt appears. Enter your credentials and click the Login button. Or, if you do not have a Conductor account, click the Create User button and follow the directions to make an account.

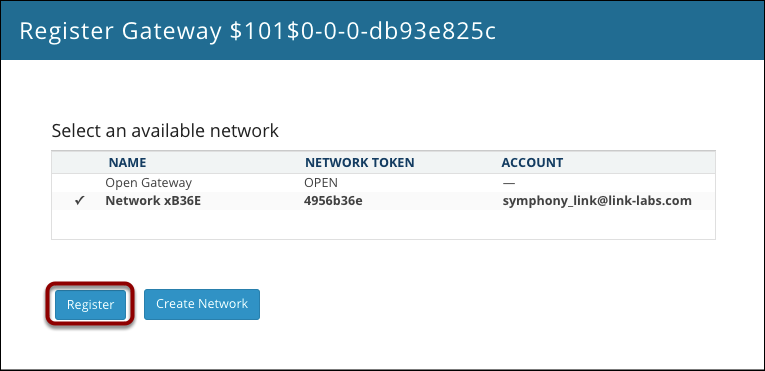
The Register Gateway prompt appears.
In this example, we're going to register the gateway with a new Symphony Link Network. (But if you want, you can simply register the gateway with the Open Gateway network.) Click the Create Network button.
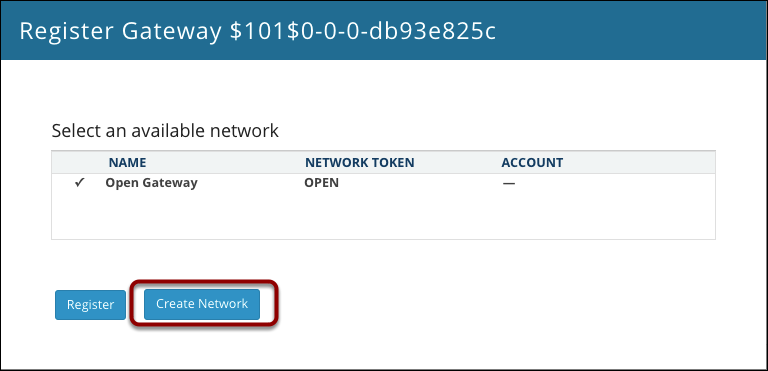
Conductor populates a new, unique network to the list. In this example, it is Network xB36E. (We'll rename it later.) Click the Register button.
The prompt disappears and the Symphony Registration section of the local webpage updates. It shows the gateway is registered with the newly created network. (You may need to refresh your browser.)

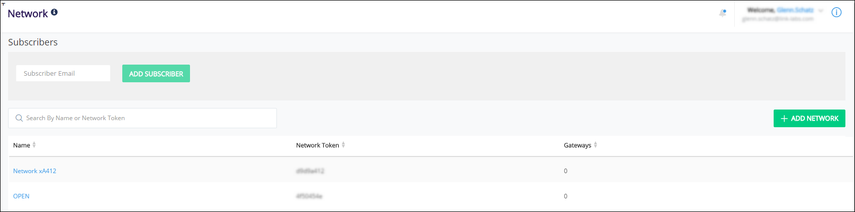
Step 5: Organize your Conductor account
Add a new application to your Conductor account.
Open a browser and navigate to conductor.link-labs.com. Log in using your account credentials.
In the Applications section of your Conductor account, click the Add Application button.

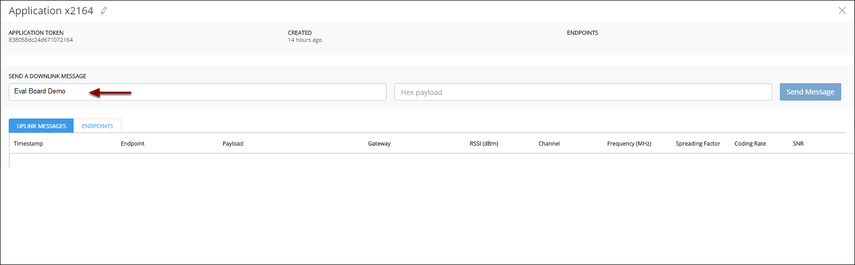
Conductor generates a new, unique Application Token and adds it to the list. In this example, the new application is called Application x2164.

Click on the name of the new application. The Application pop-up window appears.

Rename the new application by entering "eval board demo" (or whatever you would like to call it) in the NAME field of the pop-up window.
Exit by clicking outside the pop-up window. The new name of the application updates to the list of applications.

Record the Application Token of the "eval board demo" application -- we'll use it later. In this example, the Application Token is
dldlae4f679bbb7ffaa9Rename the new Symphony Link network you created in Step 4.
Click on the name of the new network in the Networks section of your Conductor account.
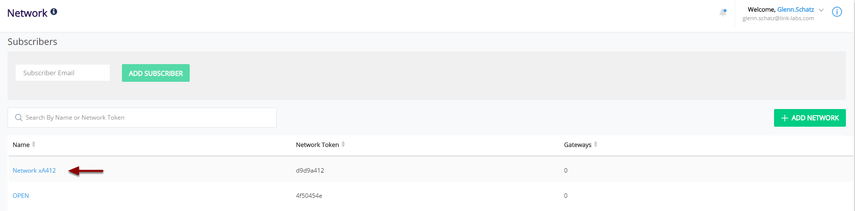
The Network pop-up window appears.
You can rename the network by clicking on the pencil icon next to the network name.
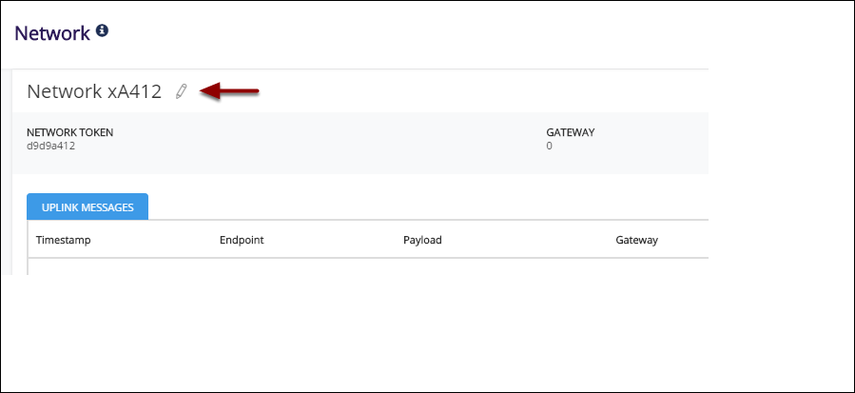
Record the Network Token associated with the network -- we'll use it later. In this example, it is:
d9d9a412Step 6: Setup the USB-UART evaluation board
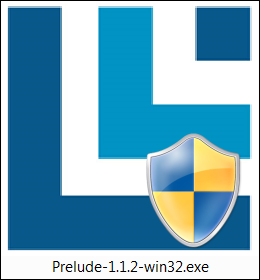
Install Prelude.
Download and run the latest Windows installer for Prelude. Follow the on-screen instructions to install Prelude to your PC.
When installation is finished, launch the Prelude application.
Connect the evaluation board.
Connect the evaluation board to a PC using a mini-USB cable.
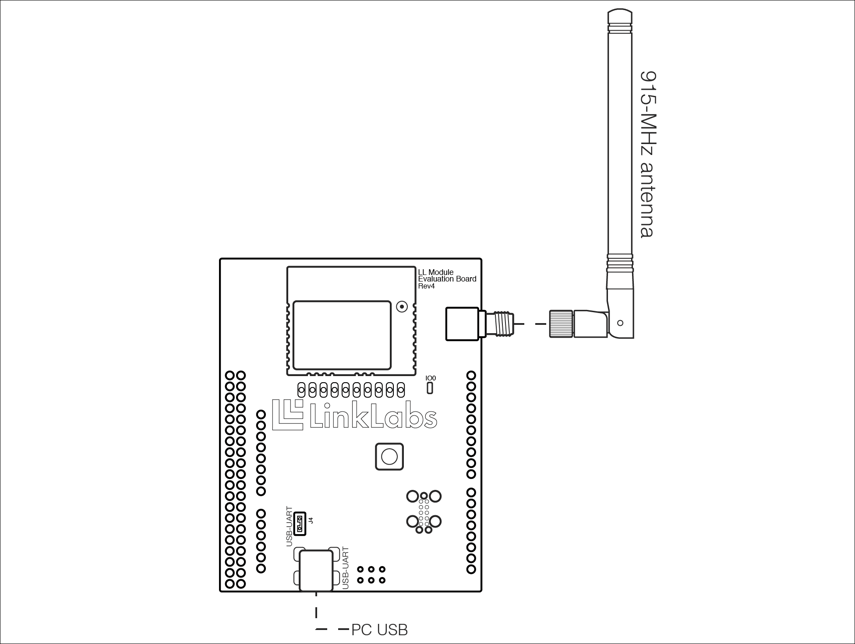
Once connected, a red LED on the evaluation board lights up. This LED lights up anytime the Symphony Link Module has set one or more interrupt request flags. (In this case, the LED indicates a RESET event has occurred because you just supplied power to the board.)
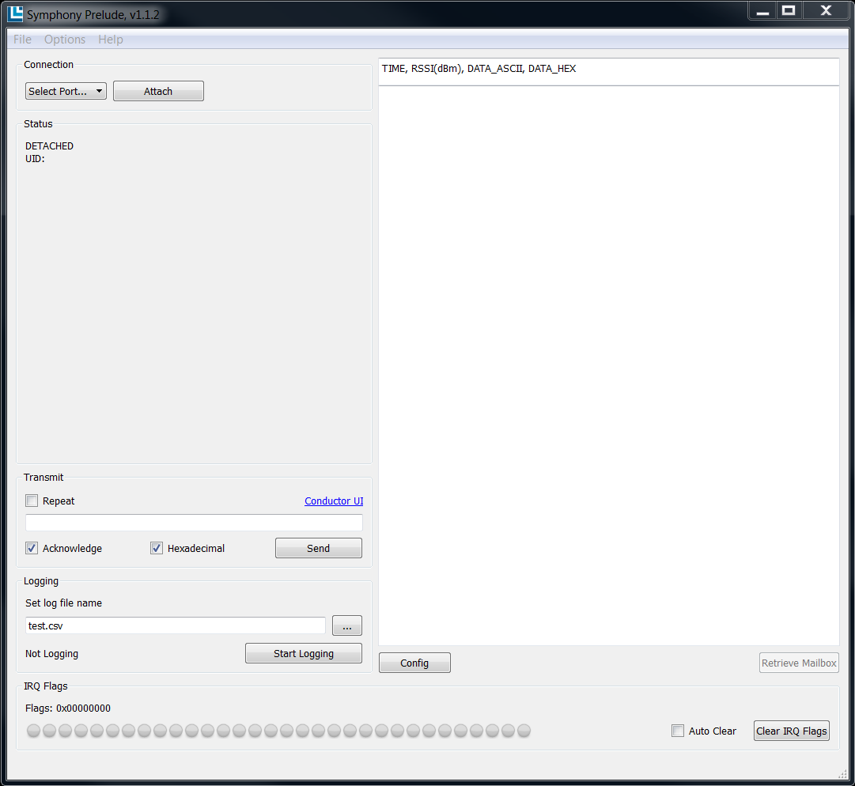
From the Select Port dropdown of Prelude's Connection group box, select the COM port associated with the evaluation board. Click Attach.

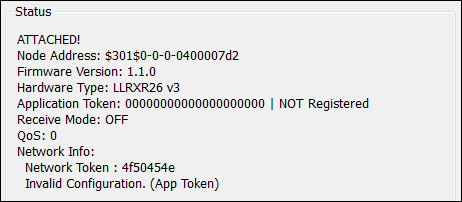
Prelude's Status groupbox will begin to update with the module's parameters.
Step 7: Register the module
Shift the module to "A simple network."
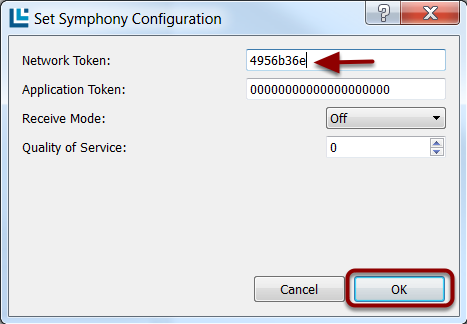
From Prelude's Options menu, select Set Symphony Configuration. The Set Symphony Configuration pop-up appears.
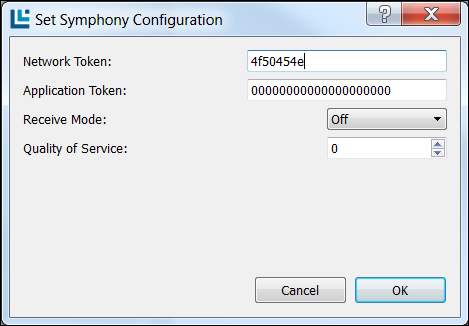
In the Network Token editbox, enter the Network Token of "A simple network." Click OK.
Register the module to the "eval board demo" application.
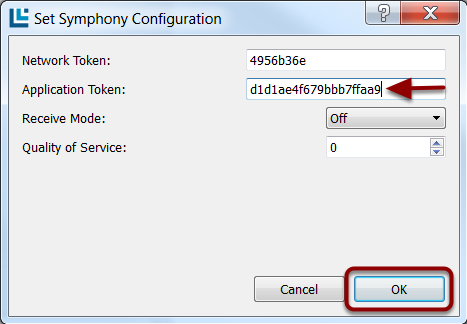
Re-open the Set Symphony Configuration pop-up (Option > Set Symphony Config).
In the Application Token editbox, enter the Application Token of the "eval board demo" application. Click OK.
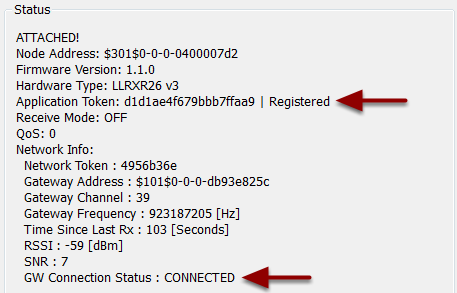
Prelude's Status pane begins to update as the Symphony Link Module connects to the gateway and registers its Application Token with Conductor.
In your Conductor account, the "eval board demo" application now shows that it includes one ENDPOINT (meaning one Symphony Link Module).

Step 8: Send an uplink message
In Prelude's Transmit groupbox, enter a hex-string message, like "1234". Click Send.
In the Applications section of your Conductor account, click on the "eval board demo" application to open the application's pop-up window.
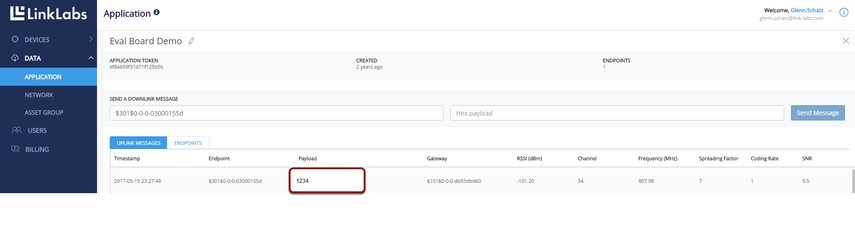
If the uplink operation is successful, the message posts to the PAYLOAD section of the Message Monitor.
Step 9: Send a downlink message
Downlink using "Downlink Always On" mode...
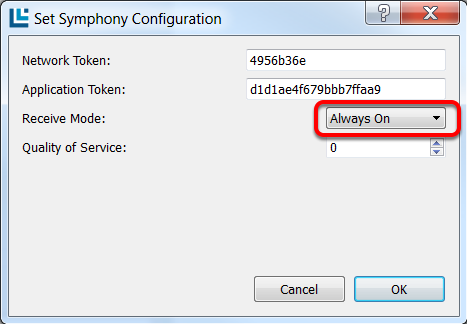
From Prelude's Options menu, select Set Symphony Config. Set the Receive Mode dropdown to Always On. Click OK.
In your Conductor account, find the Downlink section of the "eval board demo" Application.
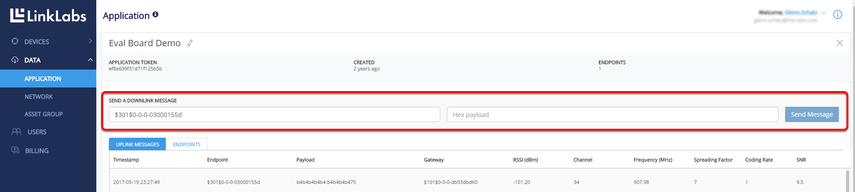
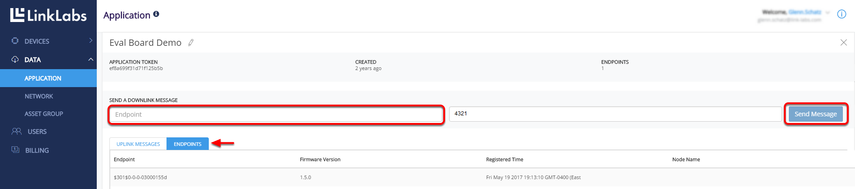
Select the UUID of the Symphony Link Module on your evaluation board using the "Endpoints" tab, or manually enter a valid UUID in the "Endpoint" box. Enter a hex-string message in the Hex payload editbox, like "4321". Press Send Message.
The message will post to Prelude's Receive Window.

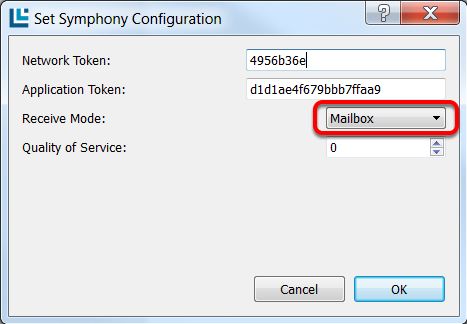
Downlink using "Mailbox" mode...
From Prelude's Options menu, select Set Symphony Config. Set the Receive Mode dropdown to Mailbox. Click OK.
Using the Select an endpoint dropdown, select the UUID of the Symphony Link Module on your evaluation board. Enter a hex-string message in the Hex payload editbox, like "4321". Press Send Message.
In Prelude, click the Retrieve Mailbox button.
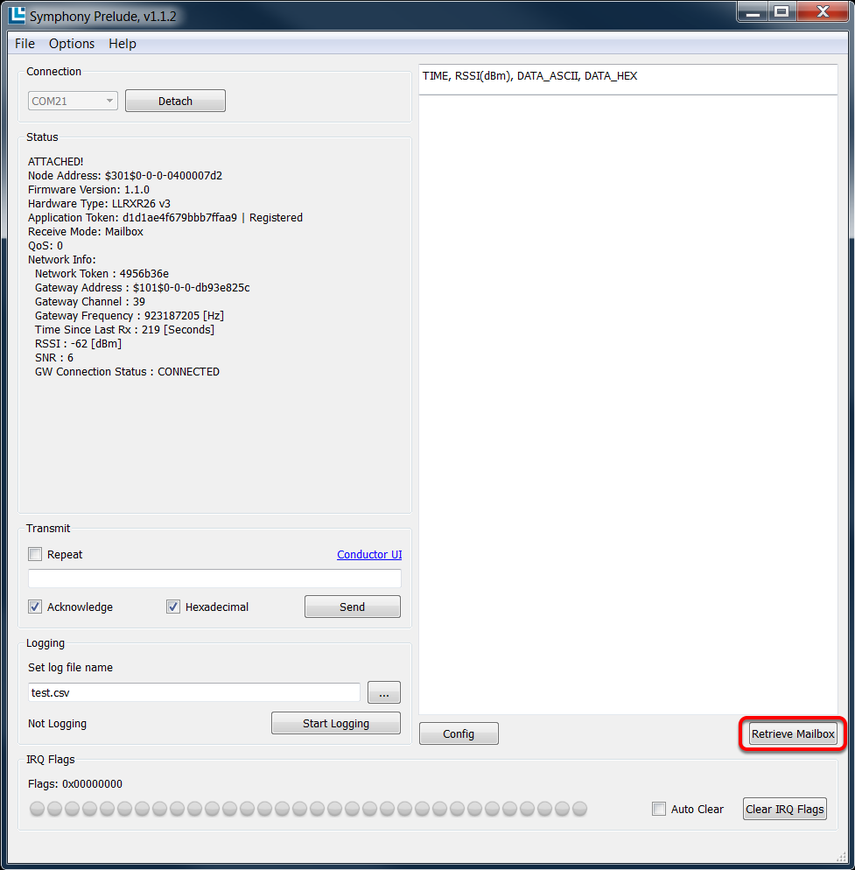
The message will post to Prelude's Receive Window.
